

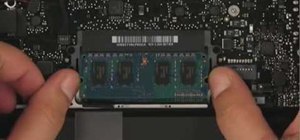
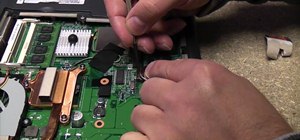
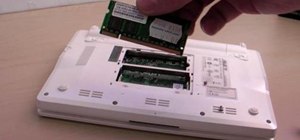
This video demonstrates the installation of memory in a 13" Macbook Pro (mid 2009 model). It's easy to perform and takes about 10min time. You'll require a #00 Philips screwdriver (available in the Newer Technology 11- piece tool kit). Take care to work in an anti-static work space. Close the Macbook Pro and flip it over with the hinge side up. You can note 10 screws along the border. Start unscrewing the 3 screws on the right on the top edge, these are longer than the rest. Now unscrew the rest which are of the same size. Starting on the hinge side slowly lift up the lid and set it aside. You can note the memory module on the right center area. To remove the memory module simply press outwards the two knobs situated on either side at the same time. The module pops up and it can be removed. Repeat the process for the second module. Line up the notch on the memory module with the pin on the memory slot. Insert the module into the memory slot at a slight angle and once it goes in fully, push down on the open edge to lock it in. Repeat the process with the top slot. Place the bottom lid back into place and install the 4 screws along the top edge. Remember to screw the long screws into the right side slots. Replace the 6 screws along the rest of the edges at an angle. Flip over your Macbook Pro, open it and turn it on. Your Mac is ready to function.
Just updated your iPhone? You'll find new emoji, enhanced security, podcast transcripts, Apple Cash virtual numbers, and other useful features. There are even new additions hidden within Safari. Find out what's new and changed on your iPhone with the iOS 17.4 update.


Be the First to Comment
Share Your Thoughts