


Couldn't believe it I put my foot down and hear Crrrrrrunch, Yep busted the screen on my laptop. Its not the end for the laptop though your average user can easily replace the screen in half an hour and bring the laptop back to life. All you need is a replacement screen and a phillips head screwdriver.

Original content from BudgetHack.com
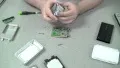
Alright the first step is to remove the battery, under the battery you will find three screws you need to undo. Refer to the picture below as to exactly where the screws are.

Remove the panel which sits along the top of the keyboard, This should simply flip out as you just removed the screw from the base. Don’t apply any force this should pretty much fall out.

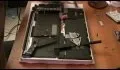
Now comes probably the hardest part of the NB200 repair , you need to remove the two rubber plugs and then the two screws pointed out in the image below. After that you need to slowly un-clip the face of the NB200 screen, you will need to apply some force to get it to un-clip but this is where you really need to be careful so you don’t break it.

Alright then your nearly there, now all we need to do is remove the actual screen. Have a look in the image below and you will see four screws marked out, You need to remove the screws going in to the lcd NOT the ones holding the lcd bracket.

Once the lcd is out turn it over and lift up the tape holding down the NB200 lcd cable, Slowly pull the cable from the lcd being careful not to damage it. You can see the cable I’m referring to below. Thats it your done pat yourself on the back, now assembly is just the reverse of these instructions. When reassembling be sure to check that no cables are hanging outside the lcd case.

Tips
You can see below its all fixed, not bad and for a fraction of the cost of sending it in for repair. Now I relise this is specific to the NB200 but there is no reason you can not do this on any laptop you have. Just go slow look carefully and most to all dont force things. Good Luck.


Comments
Be the first, drop a comment!