


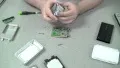
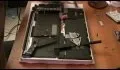
This video from OWC presents how to install memory in a 17" Macbook Pro.The operation will take about 15 minutes and doesn't require an experienced user.First you need to provide all necessary anti-static precautions - discharge static electricity, use static-free surface.You'll need #00 Phillips screwdriver and nylon pry tool.You can find these in the Newer Technology 11-piece tool kit.To start, shut down the computer, close it and flip it over.You will need to remove 10 screws. Use #00 screwdriver to remove them.After that simply lift up the bottom cover. If it's hard to remove the cover use your nylon pry tool. Then lift the whole cover straight up to detouch the center clips.Remove old memory located at the center of your computer. Press outward on the two retaining clips. The top memory module will pop up and can be removed. Do the same to remove the second module.Now install new memory modules. Line up the nudge on a new memory module with a pin on a memory slot. Insert the memory module into the bottom memory slot at slight angle, push down on the edge to lock it into place.Repeat the procedure with a top slot.Set the bottom computer cover into place and gently push over the clips on both the sides and the center. You should hear a snap as they clip together.Replace the screws. Remember that these screws do not go in straight down, but at an angle. Turn your Macbook Pro over and turn it on. You now successfully upgraded its memory.
Apple's iOS 26 and iPadOS 26 updates are packed with new features, and you can try them before almost everyone else. First, check Gadget Hacks' list of supported iPhone and iPad models, then follow the step-by-step guide to install the iOS/iPadOS 26 beta — no paid developer account required.


Comments
Be the first, drop a comment!