


Many people really like working with Toshiba laptop because they are service friendly; decent overall performance; nice-looking design; media control buttons above keyboard, etc. However, do you know how to remove and replace the keybord yourself? These steps for removing and replacing the keyboard are similar for most Toshiba laptops. You cannot install any keyboard that look the same, you should change for a compatible one.
You can remove the original keyboard and search for the part number which should be somewhere on the sticker and after that google the part number.
Also, you can search on Sunvalleyus for “Toshiba keyboard” and buy it from there.
Tip1:
If your keyboard is missing a key, it’s not necessary to replace the whole keyboard. You can fix it.
Note1:
- if your laptop is still covered by the manufacturer’s warranty, do not open the case or you can loose the warranty.
- always remove the battery and unplug the AC adapter before you open the laptop case.
- if you damage the keyboard connector on the motherboard you’ll have to replace the whole motherboard.
- proceed on your own risk.
Preparation:
Firstly, remove the battery before you open the laptop case. The keyboard securing strip doesn’t have any securing screws and shouldn’t cause any problem when you remove it.
Secondly, unlock the metal plate before you pull the keyboard cable from the connector. The keyboard cable connector on the system board is cover by a metal plate and the plate has to be removed before you can get an access to the connector. To open the connector, move the connector lock toward the LCD screen. It is enough to move it 2-3mm to open the connector. Be careful with the keyboard connector on the system board. If you damage it, the entire system board has to be replaced.
The keyboard removal instructions will be almost the same for most modern Toshiba laptops.
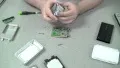
Step1: Lift it up with a small screwdriver and remove using fingers. On most Toshiba laptops the keyboard bezel doesn’t have any circuit board underneath, it’s just a piece of plastic and you don’t have to worry about cables.
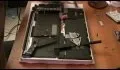
Step2: After the bezel is removed you get an access to the keyboard screws. Remove two (or more) screws. Release the plastic latch pointed with the red arrow and lift up the keyboard. Carefully put the keyboard aside so you can access the connector underneath the keyboard. Do not forget that the keyboard is still connected to the motherboard.
Step3: Before you remove the keyboard, you’ll have to open the connector and release the flat ribbon cable.
Note: Be careful, this type of connector is fragile.
Tip2:
If you take your Toshiba apart & evidently was not careful when removing the keyboard since it came a part from the motherboard. How do you reconnect?
1. Unlock the connector.
2. Insert the keyboard cable into the connector.
3. Lock the connector.
Note2:
1.The keyboard connector is extremely fragile and if the pins get bent even slightly it is impossible to reconnect them. Sometimes you might found that by pulling the green cable tab out of the connector itself worked great.
2. The touchpad cable can be replaced by using a snipe nosed pair of pliers.
3. Contact cemented the jack into the slot and then glued a thick folded cardboard piece between the back of the jack and the speaker box, this will prevent the jack coming loose in the future.
4. Tools required: Jewellers Starhead screwdriver, Snipe nosed pliers, contact cement, and a sharp knife to lift the cover.


Comments
Be the first, drop a comment!